
I created my very own Virtual Private Network (VPN) in the new Azure portal and would like to share my project and story. First, I would like to reference my project here where I created a VPN using the classic portal and classic Virtual Network.
There are some differences in the User Experience on creating a Virtual Network, Gateway, and Virtual Private Network using the new portal versus the classic. Here are some of my observations and opinions:
| New Portal | Classic Portal | |
| Certificates | A little more complicated in that you have to manually copy and paste your certificate root public key. Now you have to find the file, open it in Notepad, copy, and paste into the Azure portal.
Next, the type of certificate that Azure needs is in Base-64 encoded X.509 ASCII format. I needed to re-recreate my certificates that were originally done for the classic model. |
Was easy for the user to simply upload the certificate and yeah… I was done… Please bring this back!
My certificate was in Binary format.
|
| Gateways | More complicated to find (Settings –> Subnets –> click +Gateway subnet). Must create gateway first, then start VPN process. | Very easy to find. When you clicked on the diagram it created a Gateway as part of the process. |
| Virtual Private Network | No overview connection diagrams. On Overview page, it shows everything as record base. It would be nice to see diagrams here. | Nice overall diagram of connections, point and click to easily create a point-to-site VPN. |
| VPN Installation | A new and separate pop-up Microsoft program that shows progress of the install and connection setup. | Not really complicated or busy for the user, but could had masked some issues for the user if they need to troubleshoot. |
| User Experience | ☹ | 😊 |
My adventure began with reading the Microsoft article “Configure a Point-to-Site connection to a VNet using native Azure certificate authentication: Azure portal” [link].
A Point-to-Site connection allows me to securely connect to my Azure Virtual Private Network with an individual certificate installed on my computer store. If I wanted to let others have access to my network I would generate a client certificate from my self-signed root certificate that I previously made and uploaded into Azure. My VPN buddy would then install this certificate into their windows store and then be able to connect to my VPN without having to enter a username and password (after they had installed the VPN). My VPN buddy would be someone I would trust and have some way to revoke access to their machine and/or certificate store if needed. I could also regenerate and replace my root certificate in Azure.

Create a Virtual Network (new Portal)
Since the classic portal is about decommissioned, including the templates for classic Virtual Networks, I would recommend creating with the default in the new portal.
Here are some examples of default numbers or entries you can copy in that work:
Address Space: 192.168.0.0/16
Subnet Address Range: 192.168.1.0/24
Add a Gateway Subnet
Adding a gateway was a little more complicated than in the classic portal where all you had to do is point and click to add a VPN and then the template process created one for you. Now you need to create a gateway first before you setup your point-to-site connection. In the Azure portal you have to find your Virtual Network –> Settings –> Subnets –> Add Gateway.
I entered default 192.168.200.0/24 for address range because those numbers were shown in the example photo on the Microsoft page and they validated.
Add a Virtual Network Gateway
Again, this is something the classic portal template auto-generated or connected the process dots for us in the past, but now in the new Portal you have to add this component on your own and go out of the way to the main menu to find this template by keyword “Virtual Network Gateway”. I followed the default configurations from the article and clicked through the settings. The method to make a gateway using the classic portal seemed easier then than now with the new portal. The documentation and example photos were crucial to help me getting through the setup correctly.
According to Azure, the deployment process time can take up to 45 minutes so you may want to leave and go have a cheeseburger or take a stroll around the neighborhood. After some time had passed, I refreshed my blades and found a Virtual Network Gateway created under my Virtual Network.

Configuring the Point-to-Site Virtual Network Gateway
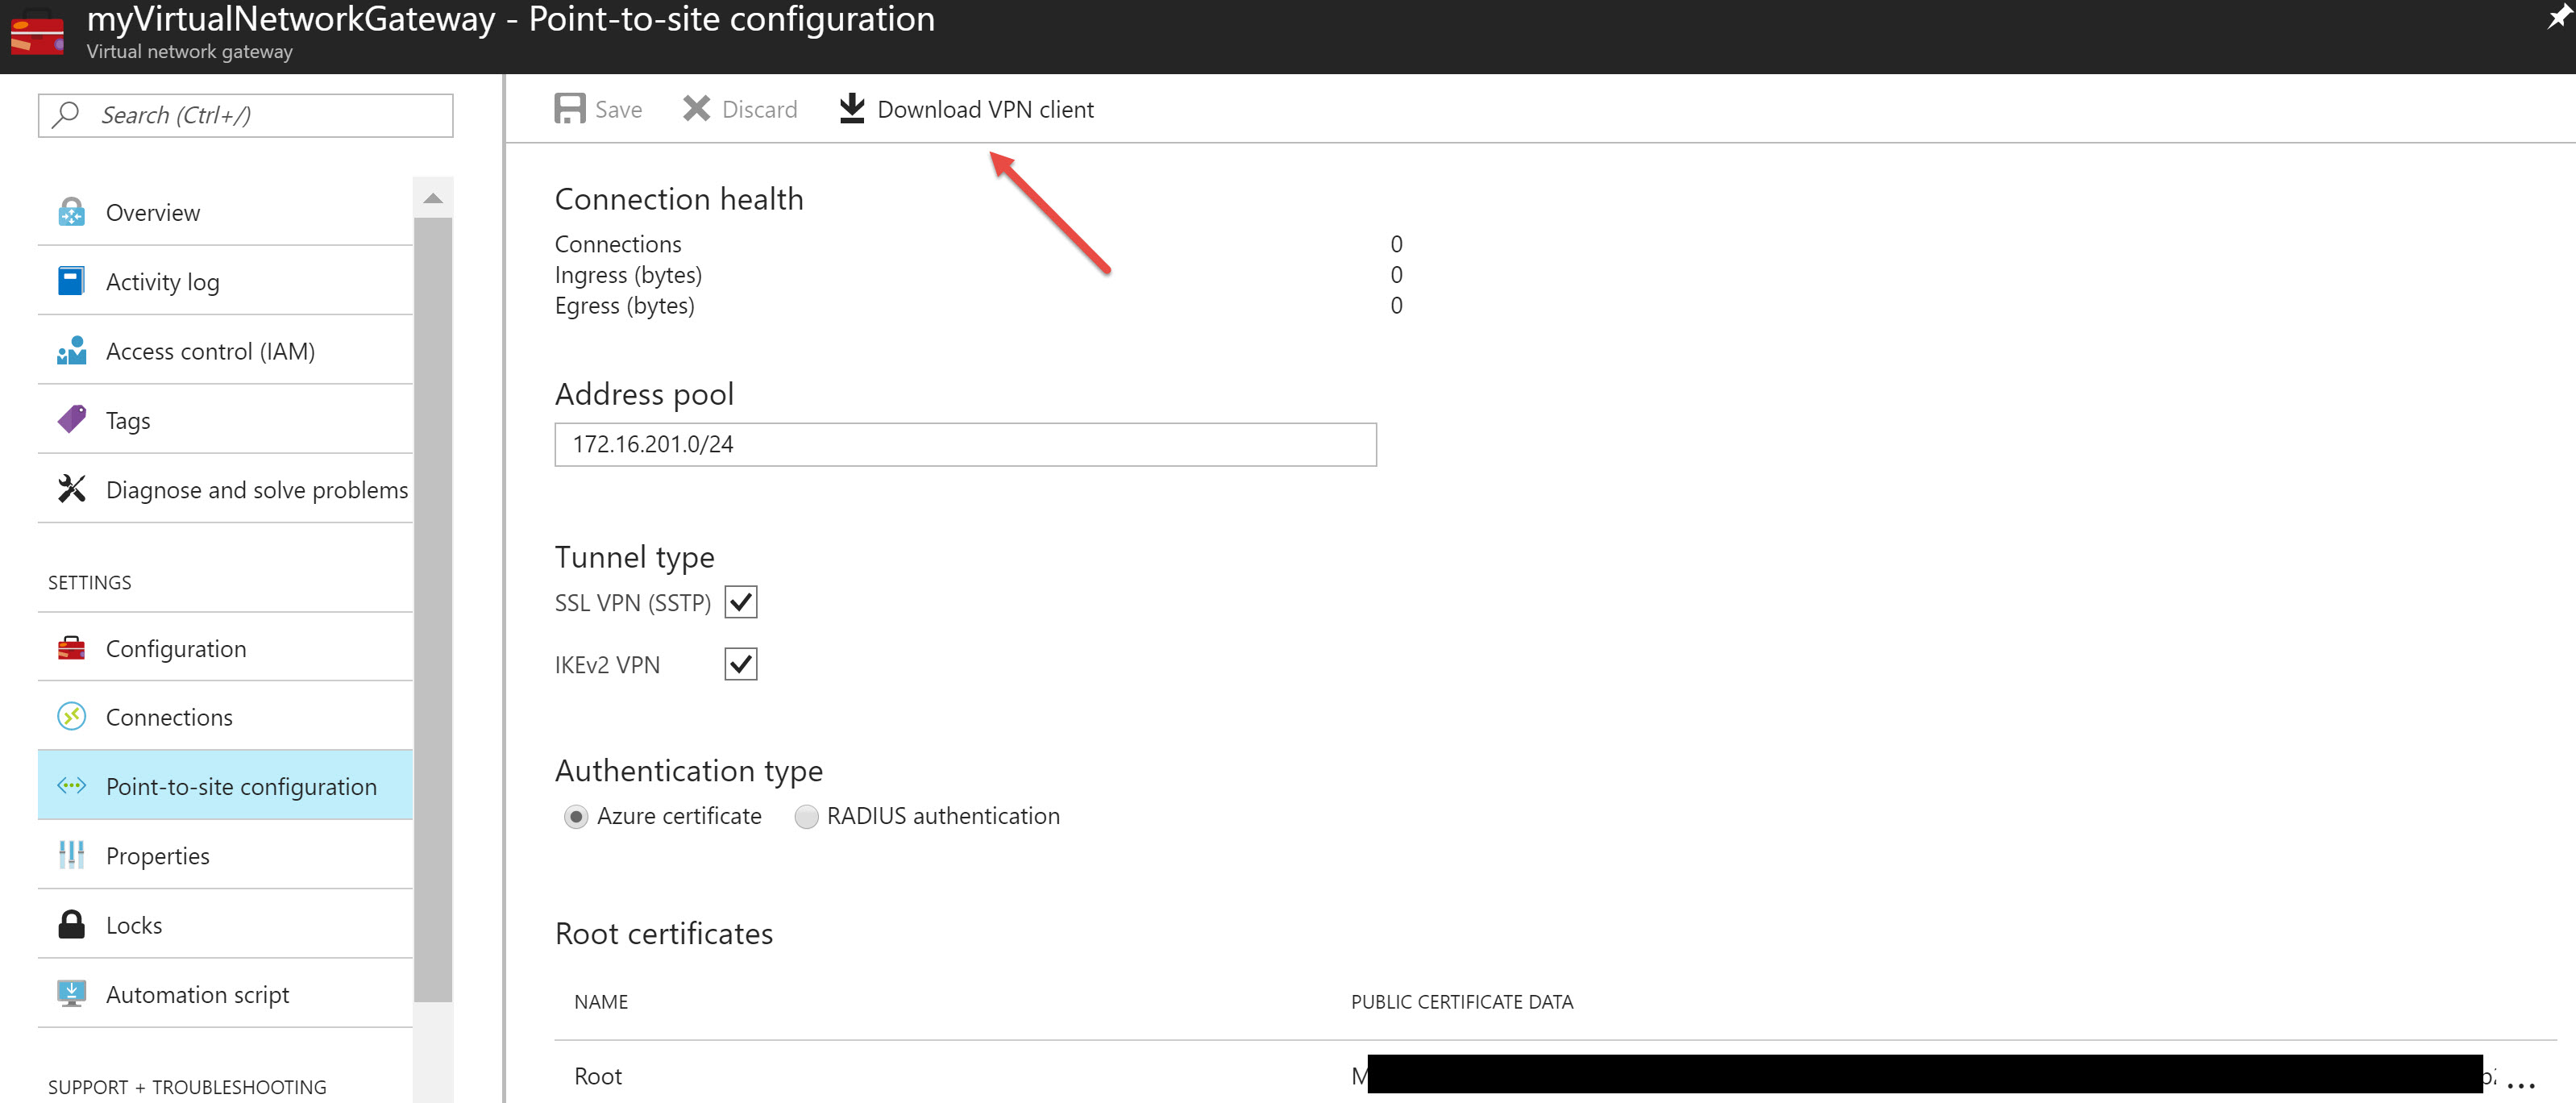
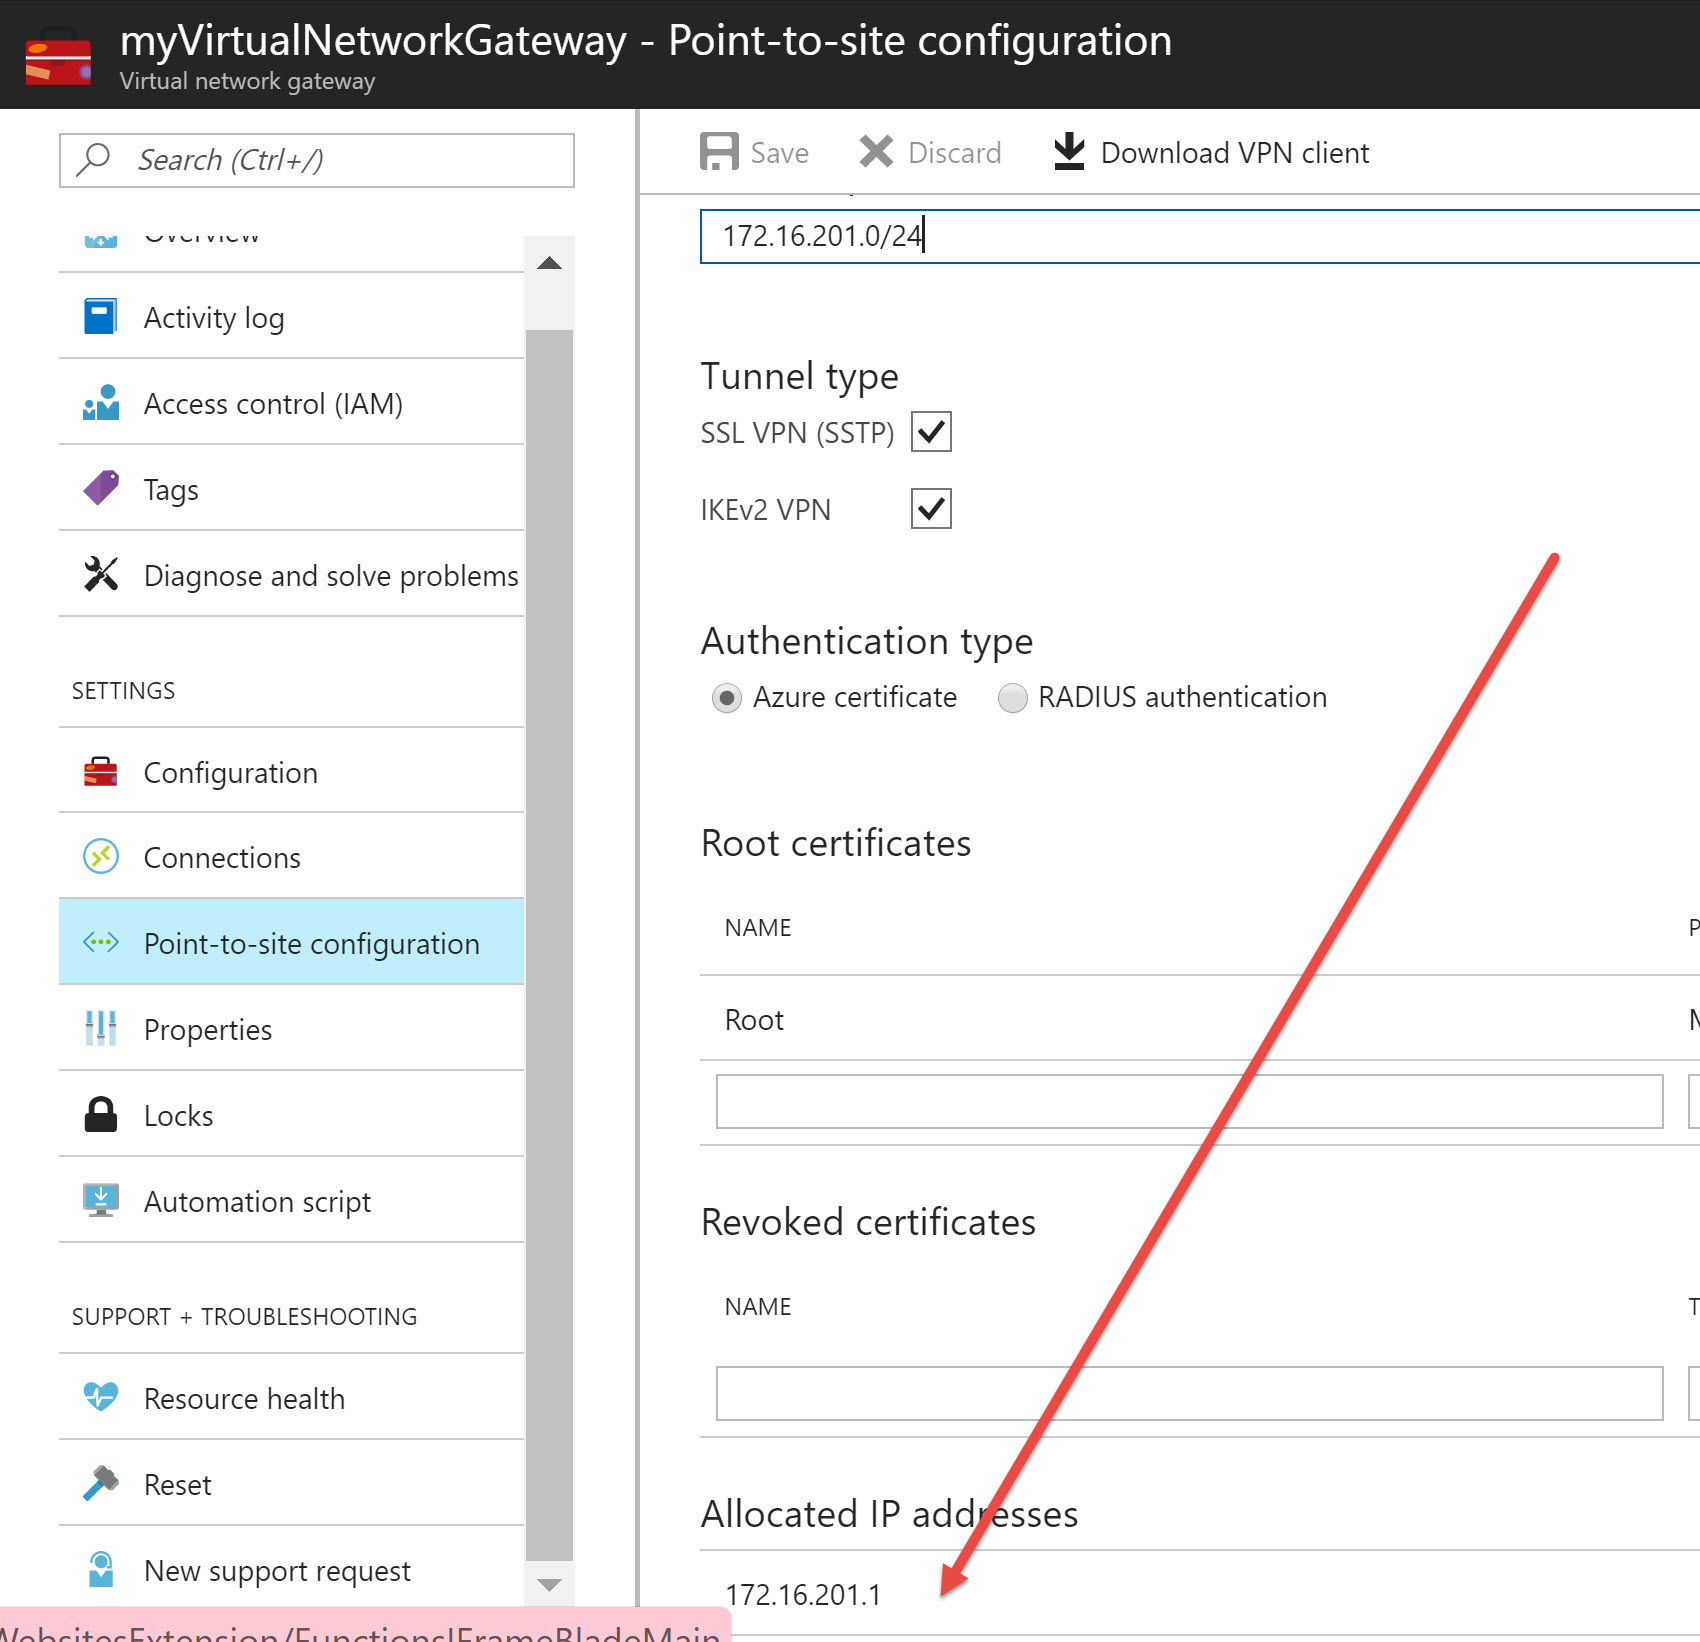
I was looking for the place to upload my certificate like I did in the classic VPN and per the documentation the configuration page is shown under the my newly created Virtual Network Gateway –> Settings –> Point-to-site configuration.
Then I entered 172.16.201.0/24 for the Address Pool (as shown in the example) because it needed a number here to validate and it worked.
Certificates
Next, I found they had changed the UI for the certificates and instead of simply uploading my file, they made the process a little more difficult to where I needed to copy and paste text from inside my file into the text box on the site.
The first step would be to find my certificate file location, then open it in Notepad, copy, and paste into the text box. However, I found out that I made a mistake through the validation error. The certificate format I used to enter as a root certificate in the classic VPN setting was in binary format but now required to be in Base-64 encoded X.509 ASCII format.

So, I was not happy about re-creating self-signing root certificates and a client certificate, but I followed the instructions in this article “Generate and export certificates for Point-to-Site connections using PowerShell on Windows 10” here [link] which was a good guide on how to get it done in the format Azure requires.
The code worked well in PowerShell and successfully created and then added my certificates to the store. If I remember correctly, before I had to manually add them to my store after creating in PowerShell, but the new technique as discussed in the article makes it mostly painless. Good Job!
PS C:\WINDOWS\system32> $cert = New-SelfSignedCertificate -Type Custom -KeySpec Signature `
-Subject “CN=P2SRootCert” -KeyExportPolicy Exportable `
-HashAlgorithm sha256 -KeyLength 2048 `
-CertStoreLocation “Cert:\CurrentUser\My” -KeyUsageProperty Sign -KeyUsage CertSign
PS C:\WINDOWS\system32> New-SelfSignedCertificate -Type Custom -KeySpec Signature `
-Subject “CN=P2SChildCert” -KeyExportPolicy Exportable `
-HashAlgorithm sha256 -KeyLength 2048 `
-CertStoreLocation “Cert:\CurrentUser\My” `
-Signer $cert -TextExtension @(“2.5.29.37={text}1.3.6.1.5.5.7.3.2”)
PSParentPath: Microsoft.PowerShell.Security\Certificate::CurrentUser\My
Thumbprint Subject
———- ——-
364A7… CN=P2SChildCert
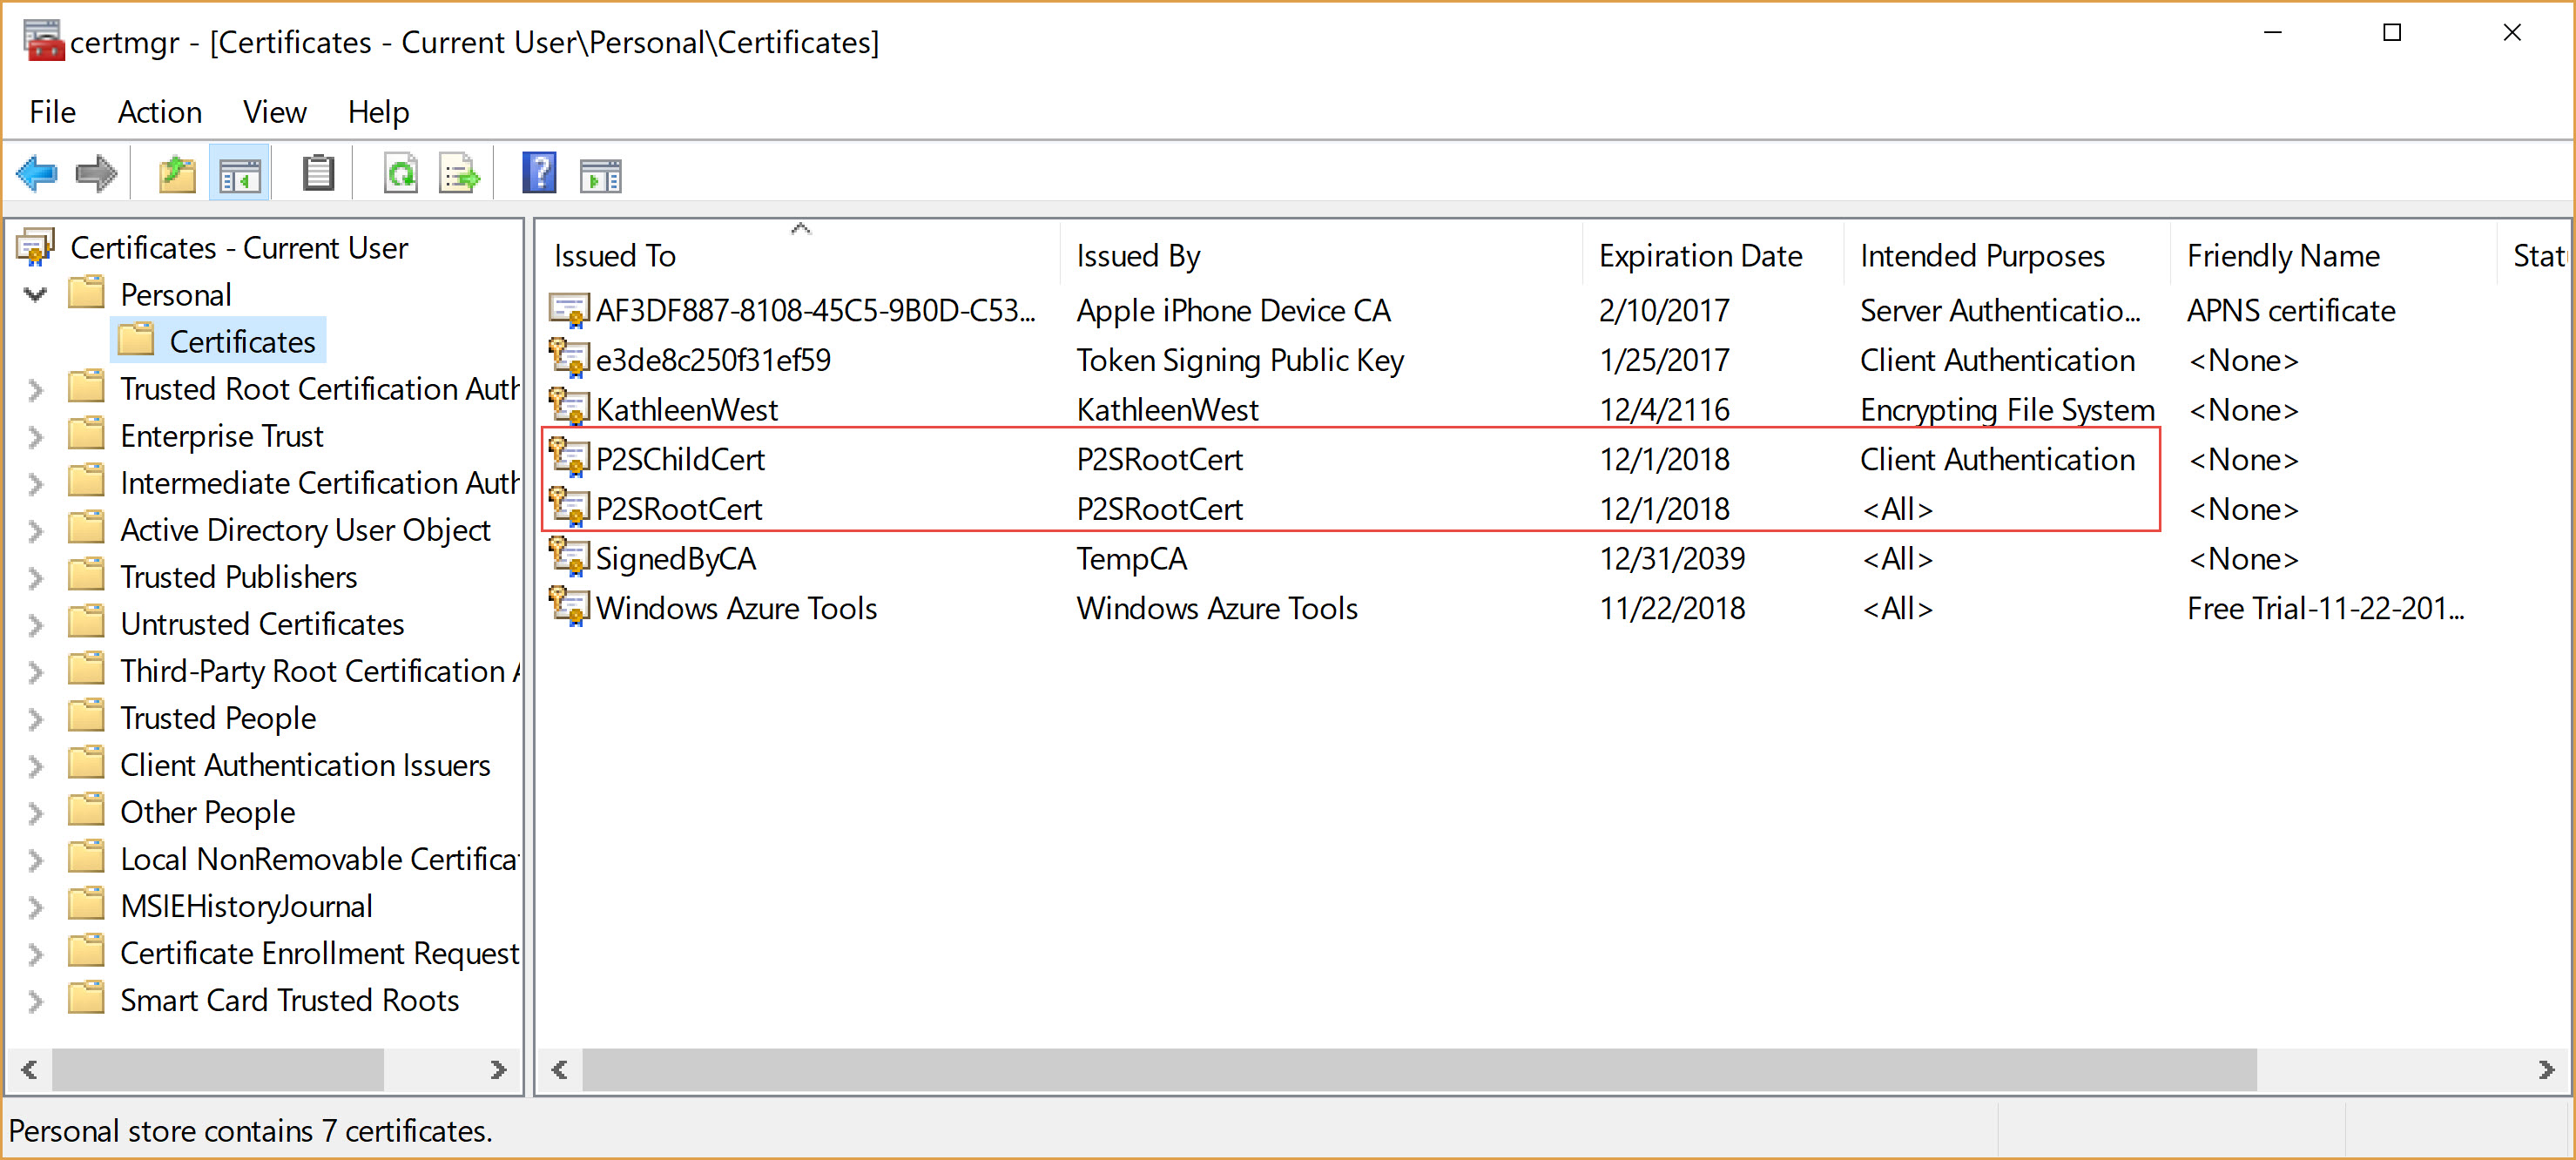
Notice the client certificate (child of root) was automatically added to my certificate store (nice job PowerShell). If you wanted to have your buddy join your VPN party then you would Export the child certificate and send the file to him to import into their certificate store. Here is a [link] to the documentation on how to do that.
Download and Install the Windows VPN Client Software
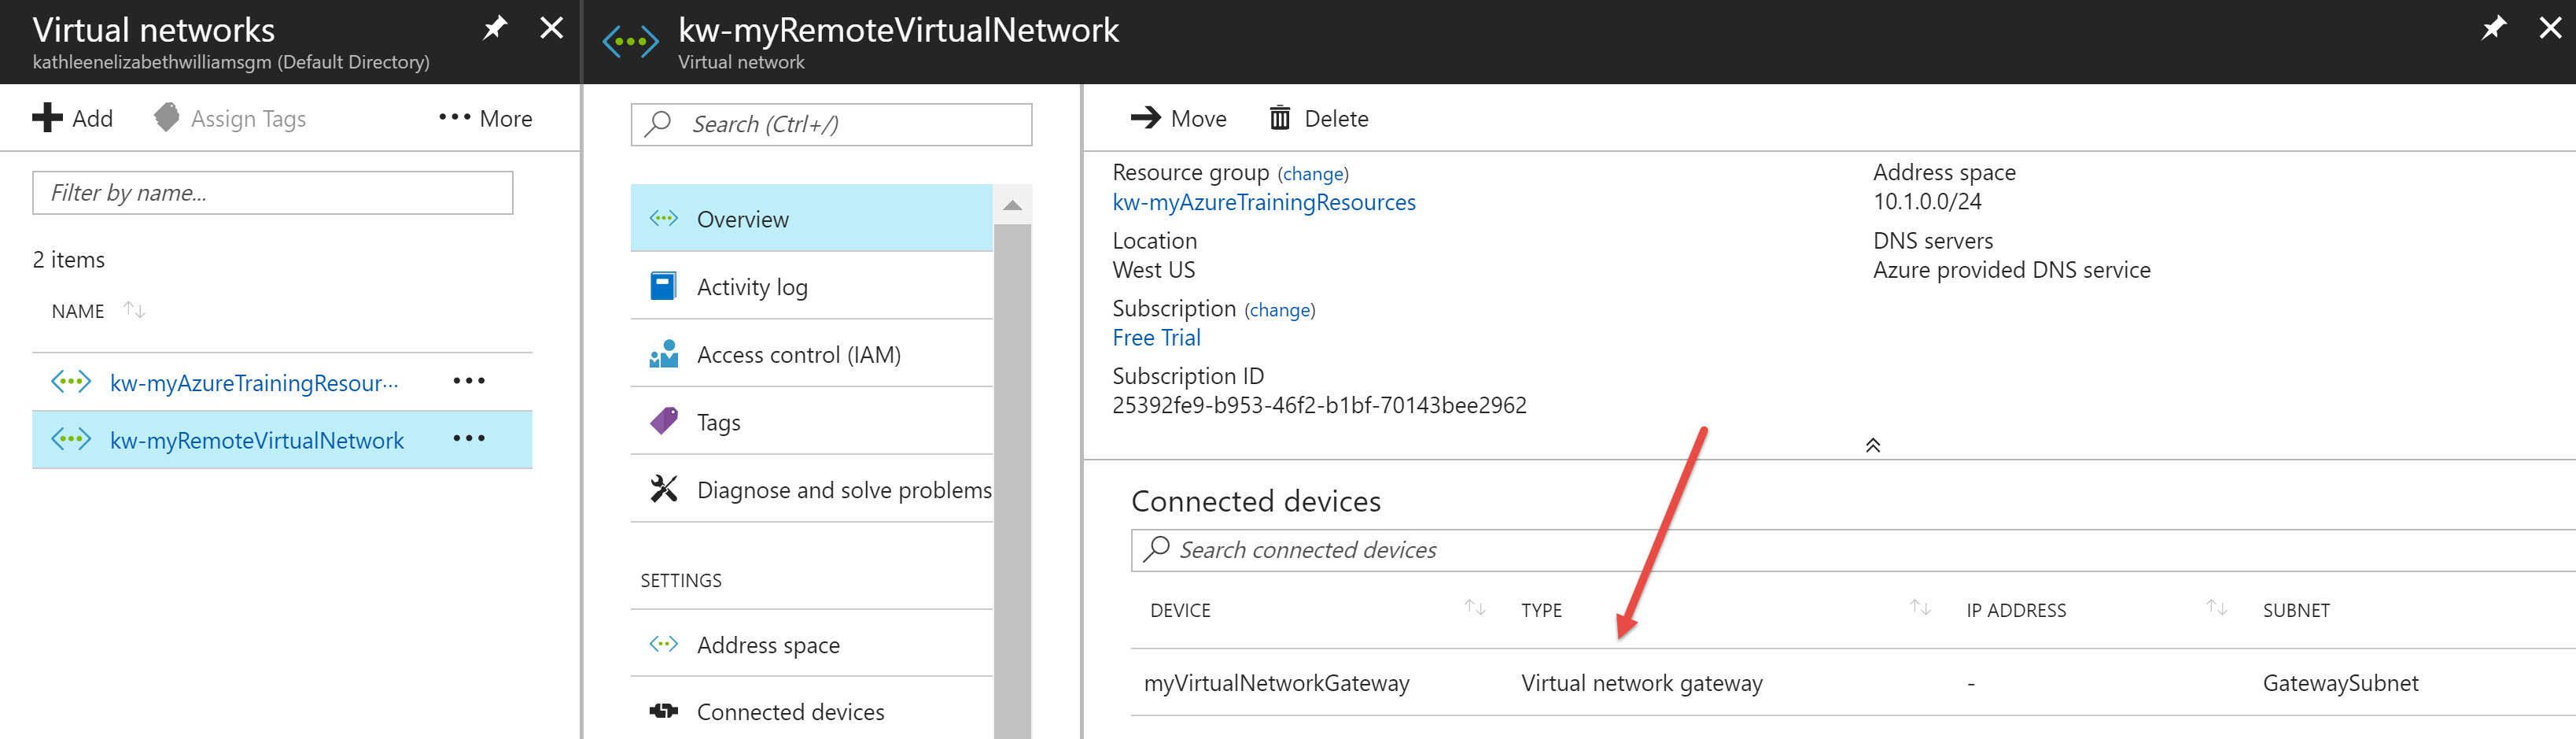
To get the downloadable VPN installation executable file, you have to first pass the challenge of finding it. It’s under your Virtual Network–> Connected Devices–> Your Virtual Network Gateway –> Settings –> Point-to-site configuration –> Download VPN Client
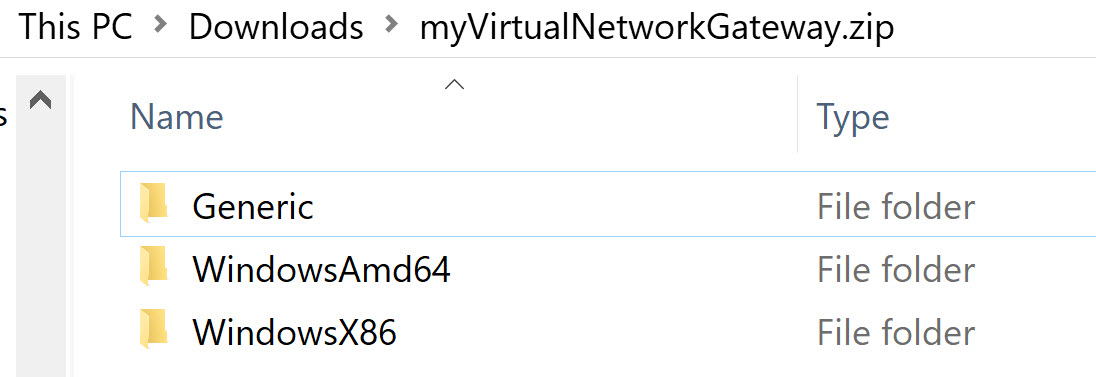
It will download as a zip file so you can pick and choose how to install. I picked the 64-bit folder and ran the executable as an Administrator. Fair warning you may get all sorts of fits from your Antivirus programs but it is a safe program to run and install. Follow the motions to install a VPN connection.
Connecting to VPN
If you enter “VPN” in the windows search bar, it will bring up the VPN Settings and you should now notice your custom Virtual Network listed. Before when I used my classic Virtual Network VPN, clicking on “Connect” did a lot less pomp and circumstance. Now, using the new portal VPN process, clicking on connect will load the Windows Azure Virtual Network window which will ask you to click connect again, give elevated privileges to a file, and update you on all the verbose details. Not sure why I have to go through the same show every time I want to connect to my VPN…maybe it is for advanced troubleshooting?
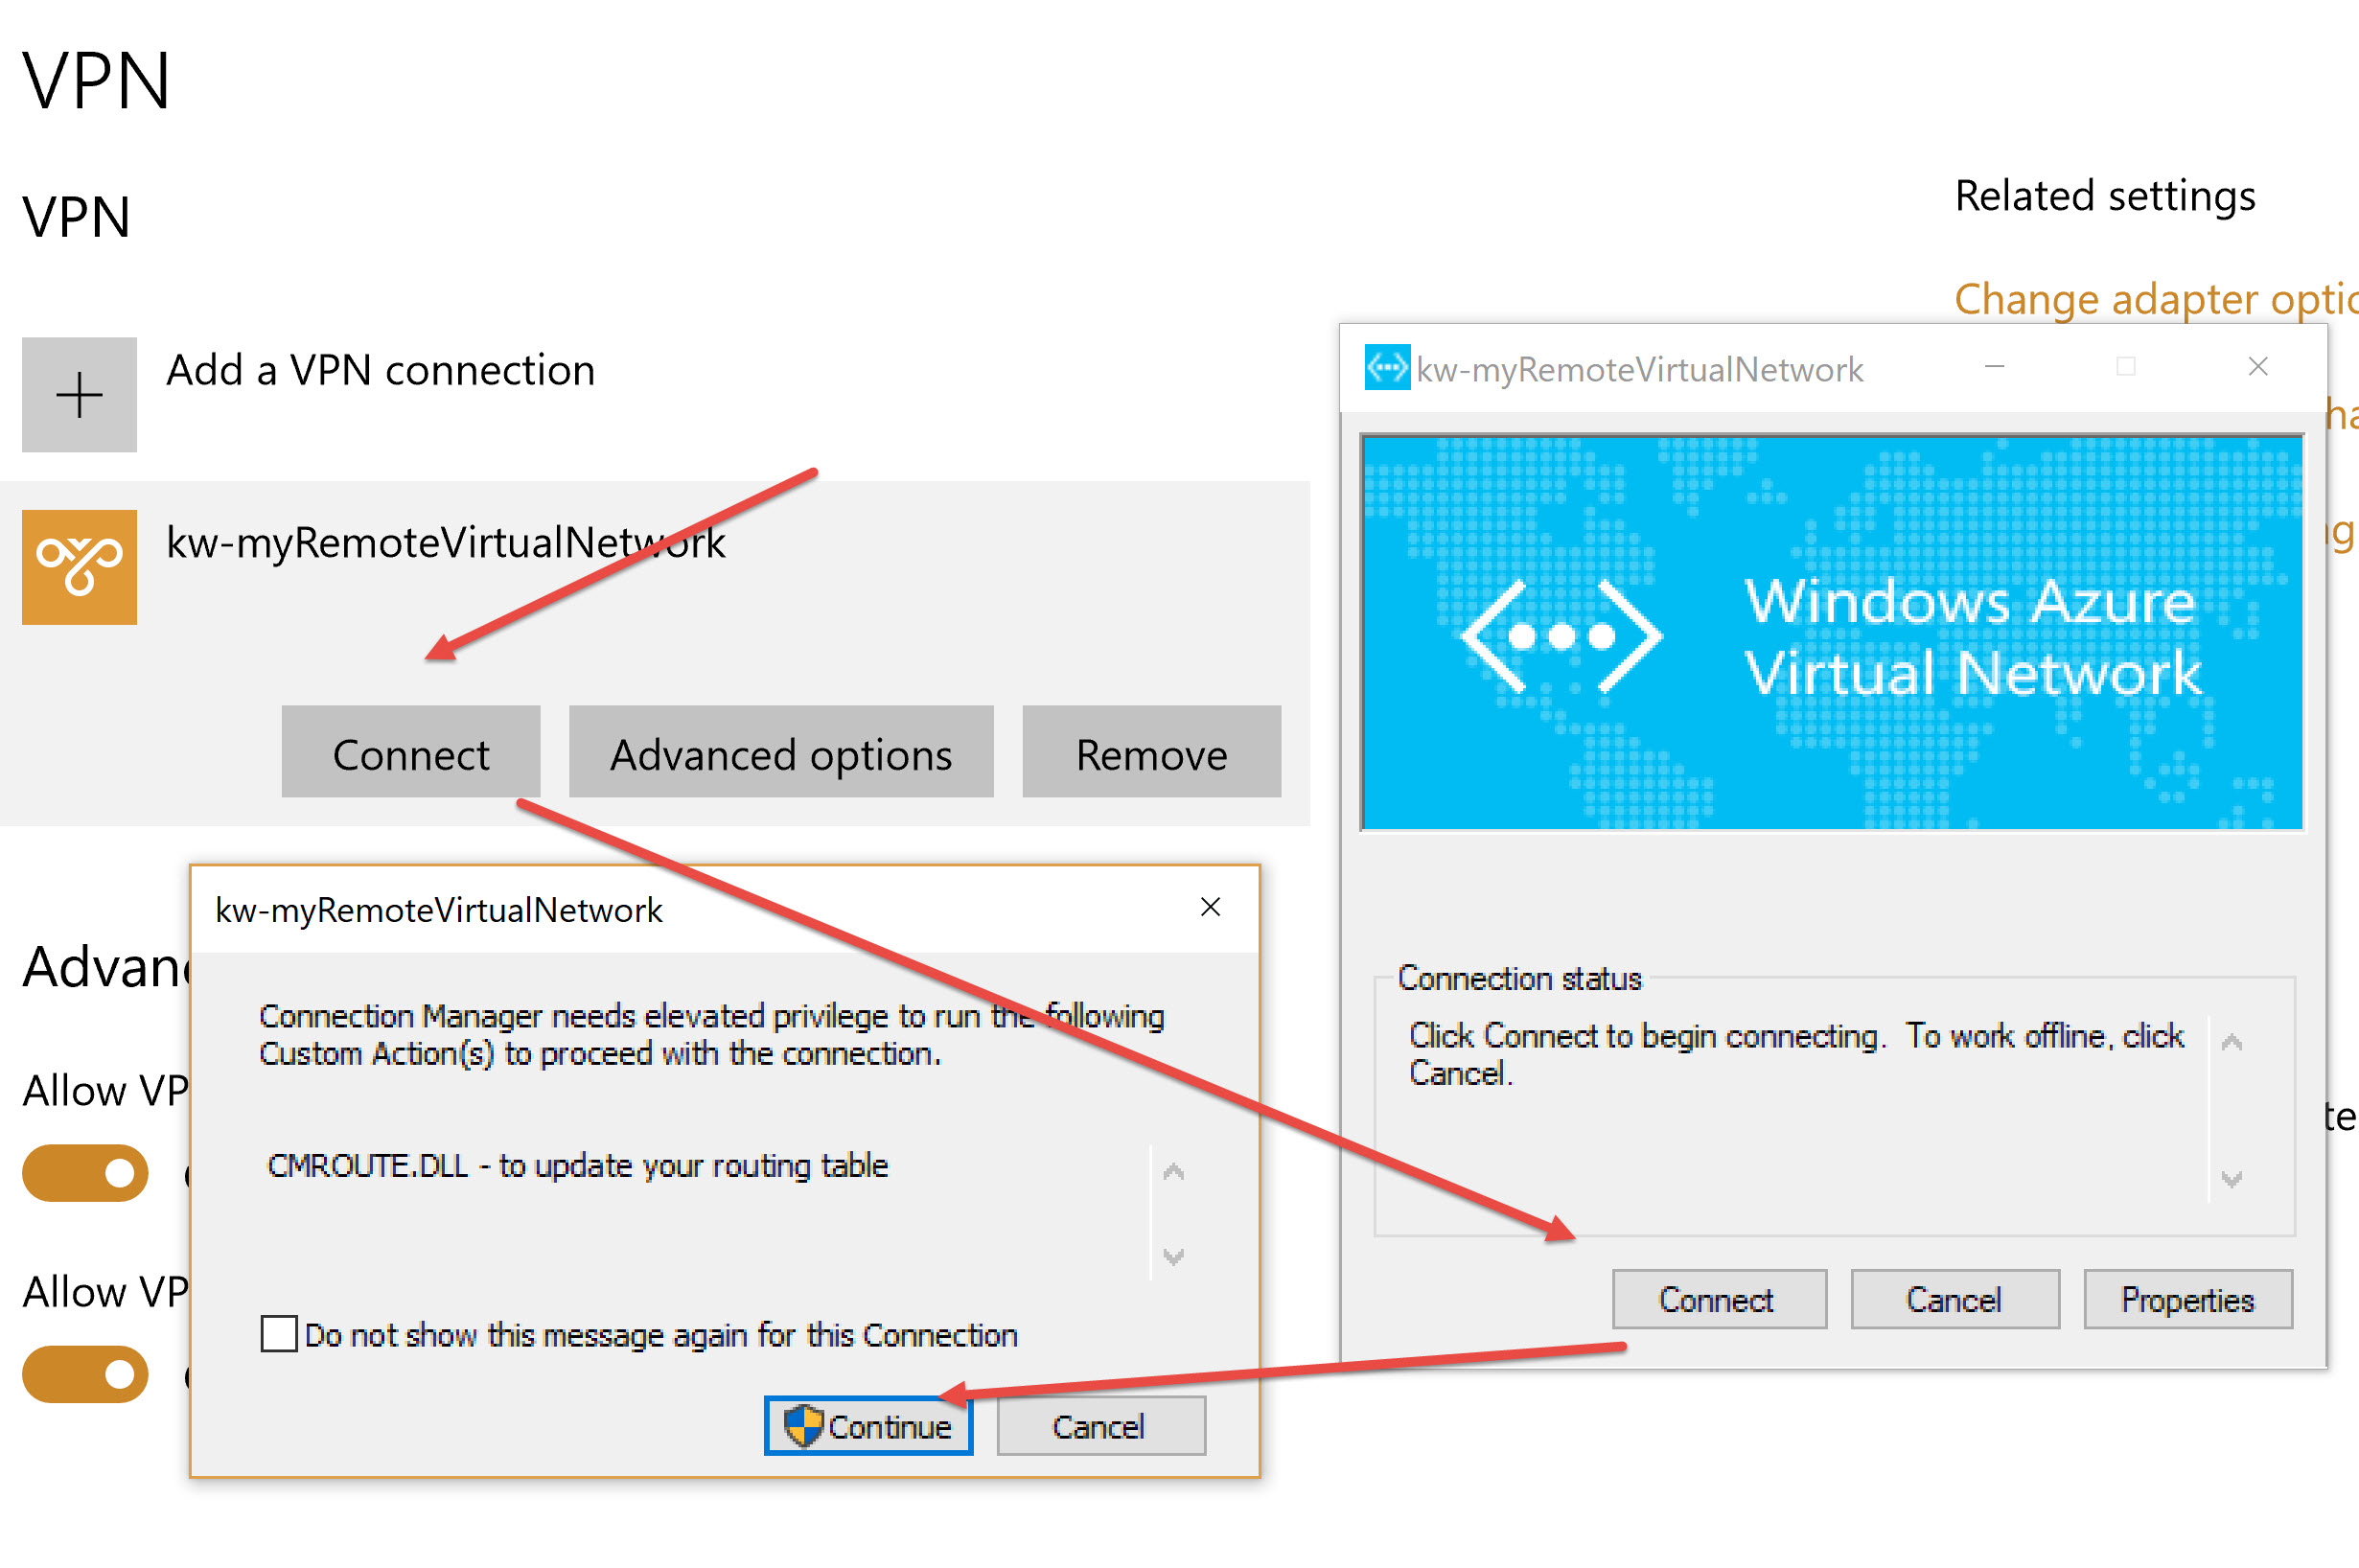
The show may stop with the Windows Azure Virtual Network window still open and doing stuff like my screen capture below:
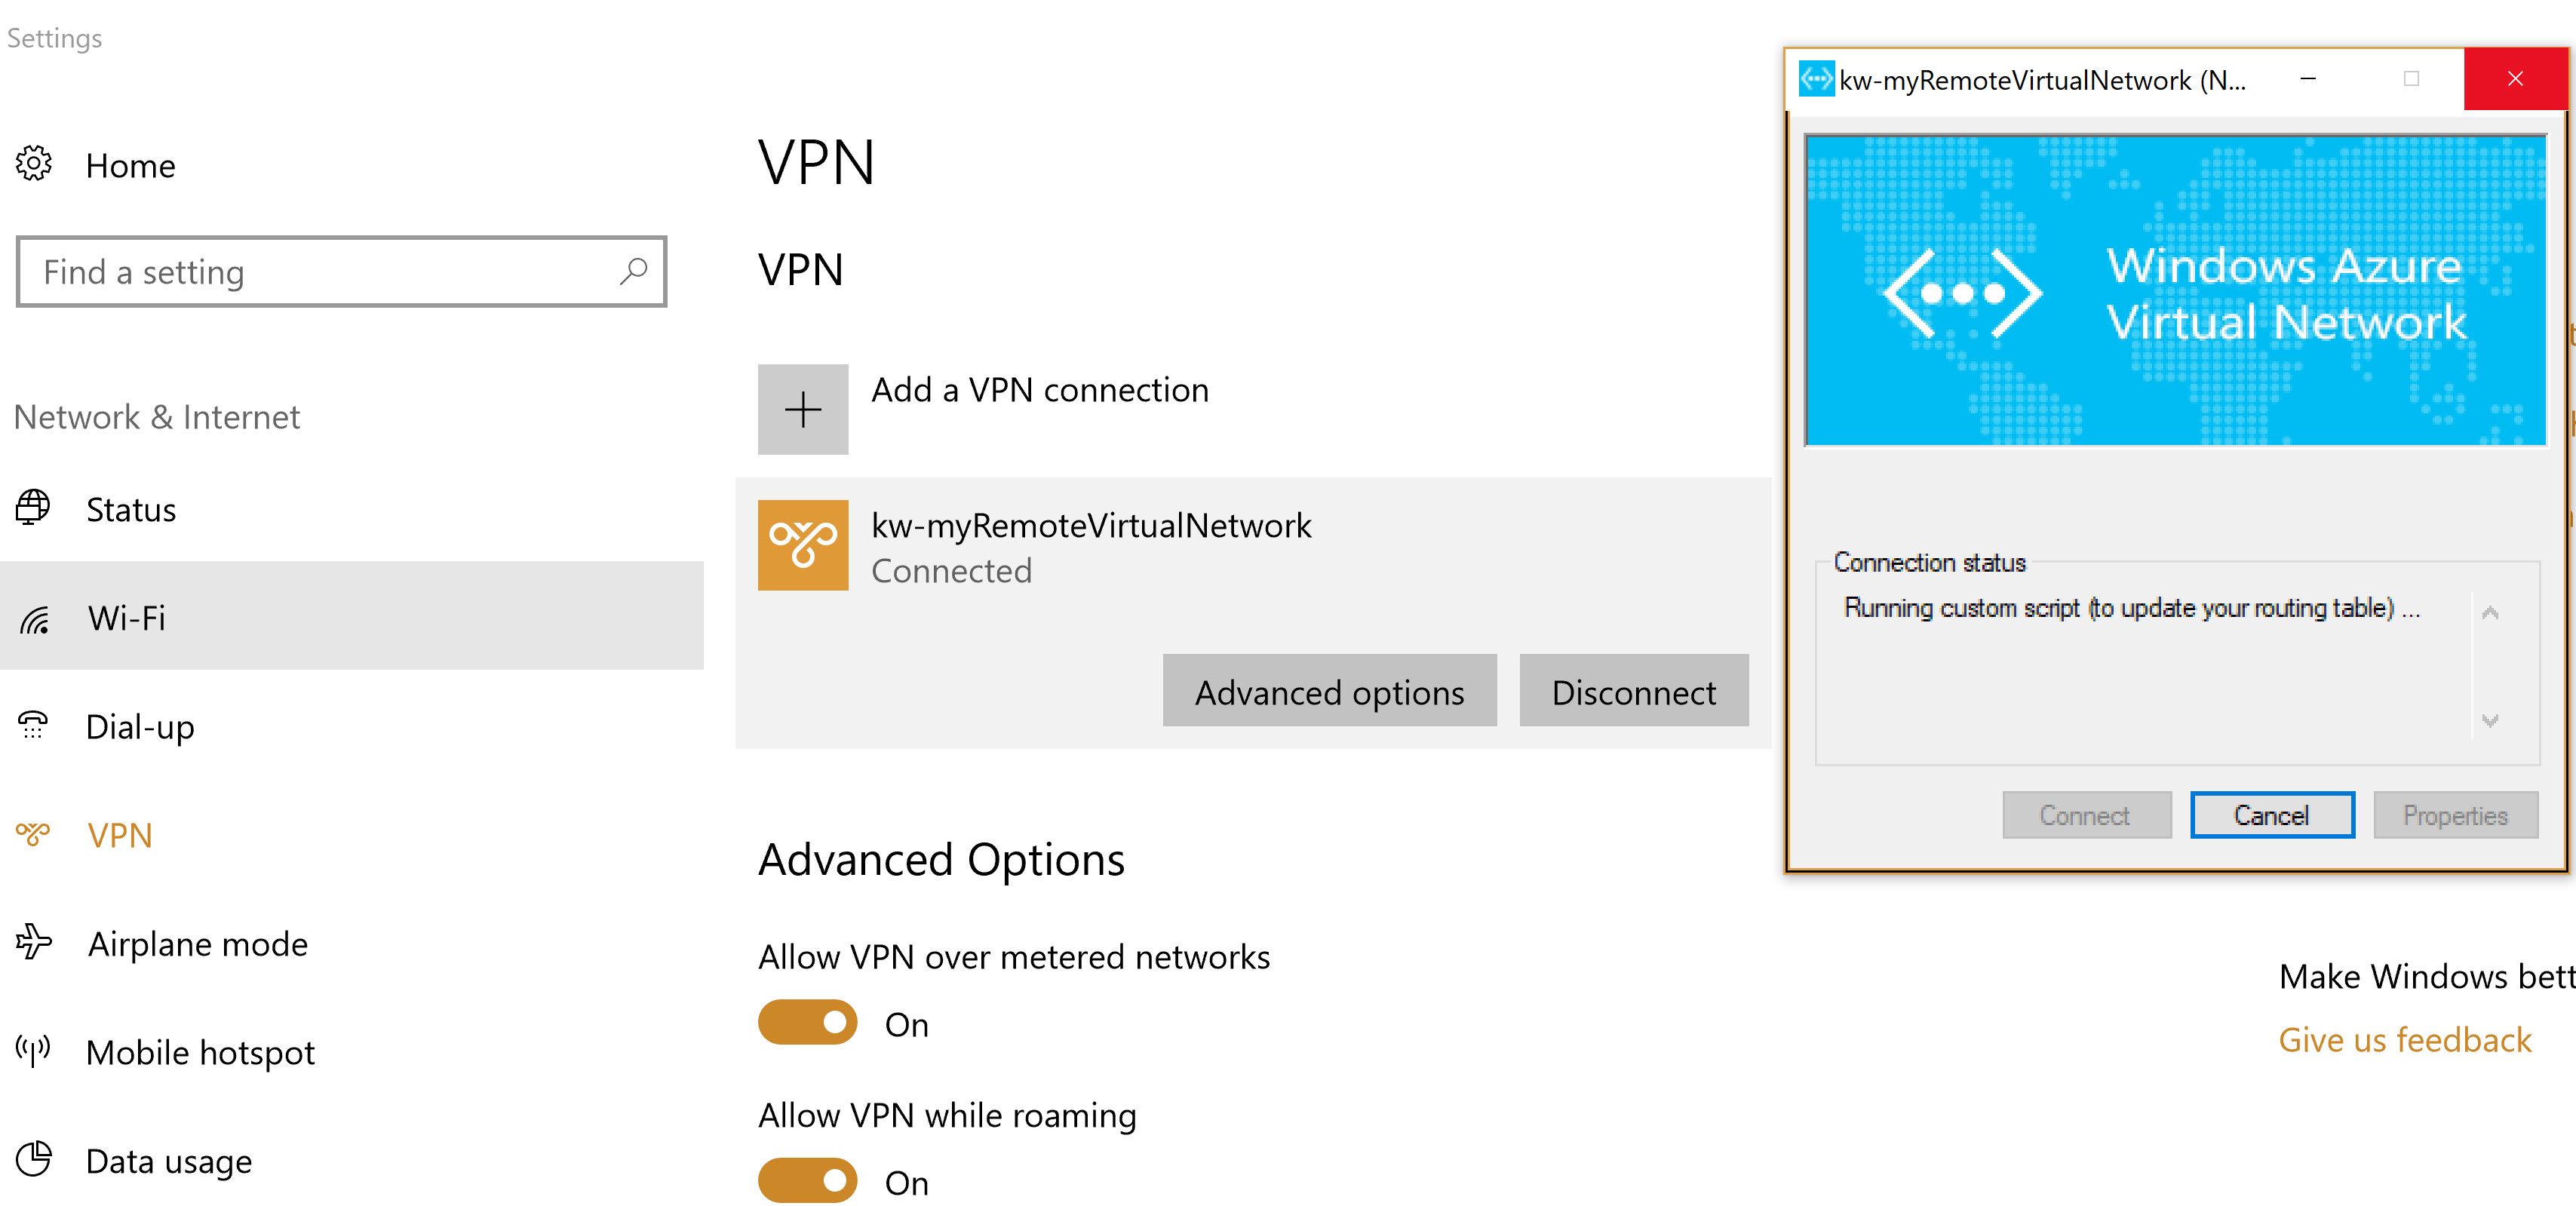
You are now Connected to your VPN and can minimize that Windows Azure Virtual Network dialog window and check out your advanced options to see your connection.
Explore Your Presence
You can run a quick check of your internet configuration by ipconfig from a command line window.
C:\Users\KathleenWest>ipconfig
Windows IP Configuration
PPP adapter kw-myRemoteVirtualNetwork:
Connection-specific DNS Suffix . :
IPv4 Address. . . . . . . . . . . : 172.16.201.1
Subnet Mask . . . . . . . . . . . : 255.255.255.255
Default Gateway . . . . . . . . . :
In the new Azure Portal, it was a lot less intuitive and harder to find the client connections currently active under the VPN, but it is shown under the Point-to-site configuration blade. It would be nice to see the overview diagram that was in the classic Virtual Network version. The IP Address shown below matches my IP as seen under my IPv4 Address when I looked at my “ipconfig” IP Configuration.
Final Thoughts
Party On, *claps hands*, I created my own Virtual Private Network in Azure and connected my PC via a client certificate.
