About
This project presents my first Virtual Reality (VR) demo built in Unity exclusively for Android Google VR Cardboard devices as part of final assignment for an online course on VR development. The project, code, and designs are creatively my own, but follow the guidance, demos, and tutorials in an online course discussed in the background section of the project article. The project article has sections that discuss the VR app features, offer a full demo video, code repo, full list of assignment requirements, and detail my background with the project.
Features
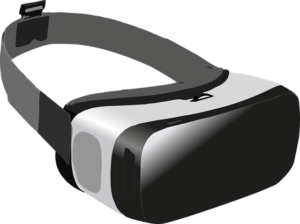
- Built for Compatible Google Cardboard VR Android Devices
- Simple Gazeable and Select System with User Interactions
- User Interface Menu and MiniMap
- Locomotion: Walk, Teleport, and Fly
- Create Objects: Furniture (Table, Chair, and Lamp) and Food (Beer, Chicken, and Pie)
- Transform Objects: Translate, Rotate, and Resize
- Wayfinding
Demo
Code
The entire project code repository is available on GitHub [here].
Background
In the early spring of 2020, I completed a course called “Creating Virtual Reality (VR) Apps: UCSanDiegoX: CSE190x” by a faculty member of UC San Diego’s Center for Visual Computing. The course was delivered online through edx and part of a 3-course bundle and certificate program called “Virtual Reality (VR) App Development”. I purchased the entire set of 3 courses for a deal of $99 per class. At the time, I was looking for an affordable entry into VR development that would allow me to be self-paced learner and provide hands-on projects. Some other comparable programs that caught my eye were also online but on the cost order of approximately $1000 per class. I convinced myself, that this affordable MOC was a good entry into learning and doing VR projects, and worth my money. Just to be honest, I only completed 2/3 of the courses in the bundle. After working through a few lessons, I felt that the “Computer Graphics” course was just too academic, boring, and not really worth my time. Besides, I am a programmer, not a graphics modeler!
Thoughts and Challenges
After explaining the origins of this project, I have to discuss the (now) irrelevance of the tech. At the time the online class lectures, labs, demos, etc. were recorded, the world of VR was very different. Fast forward to approximately 2-3 years after the recording, so many things have changed that made the course outdated and irrelevant in regards to working with Google VR Cardboard and Gaze selection technology. I’ve been using consumer VR since 2016 with various devices (Google Cardboard, Samsung GearVR, Oculus Go, Oculus Quest) and have seen it exponentially change in features and developer technology. The Unity IDE has changed significantly between the releases that often makes projects incompatible and frustrating to developers who want to use the new features but maintain the older project building without errors. At the time of writing this article (end of May 2020) here are my thoughts and observations.
The course referenced using the Google VR Cardboard SDK that by now was deprecated and no longer supported. Furthermore, I was running Unity 2019 and not older versions like 2017 as referenced in the course. Apparently so many features change, availability, and compatibility in Unity in 6 months, it’s hard to keep up as the Unity software struggles to maintain backwards compatibility on projects. Features that were once standard or selectable plugins were available through separate packages. To make my project work on demos recorded on Unity 2017, I had to hunt the solutions on the internet and be very clever as to figuring out how Unity changed the feature. In some cases, like the 3D Spatial Audio (Microsoft.SpatialAudio.Spatializer.Unity), I just could not implement the feature at all because it was no longer compatible with running independently in Unity 2019 [issue reported].
Weekly Project Assignments
Each week, the course required that we submit a Google Slides presentation relating to the weekly assignment and offering embedded videos demoing our implementation of the requirements in our Unity project. Often, I created YouTube videos to demo all the features. The list of presentations and videos are shown below.
Week 1: VR and Game Engines
Setting the Scene
Goal: Decide what type of VR application you want to make, and create a starting environment using the skills you learned this week.
Instructions
Create an initial static scene in Unity that’s going to be the setting of your experience, using Unity GameObjects or other 3D assets. You need to include a minimum of three GameObjects. Examples of scenes include a basic room, an apartment complex, a cityscape, or a natural environment. If you choose to use Unity 3D primitives, such as cubes, spheres, or cylinders, they must be rotated or scaled in some meaningful way (i.e. not randomly or incoherently placed. It should be recognizable as an environment).
Add at least one point or spotlight with at least one customized component value, such as intensity, color, range, or spot angle. Though it is not required, you may adjust environment lighting.
Add VR support to your scene by importing Google VR, testing the Google VR demo scene, and adding the GvrEditorEmulator to your own scene. In testing, make sure you can look around your scene in all three axes (roll, pitch, yaw) while in Unity play mode.
Presentation
Note: By week two, I pivoted my project scene to be just a relax room.
Week 2: Physics and Gaze Interaction
Requirements
Goal: Add new and more interesting models to your project, and create a gaze system that will let you interact with objects in your scene.
Instructions
Find and add at least 3 different 3D models to your scene. Now that you have a starting environment, it’s time to make it more interesting! Search the Unity Asset Store for any 3D models you can add to your scene. Try to find and add at least 3 different models, and place them in your scene in a meaningful way. Examples include furniture, buildings, characters, animals, decorations, and more.
Create a gaze system that will let you interact with your environment. You should start by creating a reticle that will always appear in the center of the player’s view, and won’t clip through other objects or surfaces. After that, create the gaze system and ensure that the reticle highlights when looking at any gazeable objects.
Ensure your gaze system supports gaze and input events, including OnGazeEnter, OnGaze, OnGazeExit events for when the user looks at a gazeable object, and OnPress, OnHold, and OnRelease events for when the user uses an input button while looking at an object.
Presentation
Demo Video
Week 3: 3D UI and Locomotion
Requirements
Goal: Build a user interface that you can interact with through gaze, and use it to switch between different VR movement modes.
Instructions
Create a User Interface and make it gazeable, using Unity’s built-in UI tools and the gaze system you created. Create at least two different buttons or options for locomotion modes, such as walk, teleport, or your own idea. Buttons/options on the UI should be selectable with gaze input, and there should be a clear indication of which button is selected at all times. Additionally, there should only ever be one locomotion option selected.
Add two different types of locomotion (movement) techniques that allow users to easily move around your environment. Examples include smooth movement (walking) and teleporting, but feel free to come up with your own technique. Get creative!
Connect your locomotion modes to the gazeable UI, such that users can easily switch between movement modes by selecting different UI options.
Think of and implement a third type of locomotion that allows you to move around your environment. This locomotion can be better or worse than the two existing forms of locomotion, feel free to get creative. In this slide, discuss the pros and cons of your new form of locomotion, and explain why it is better or worse. Then, decide which of the three systems is best for your application, and justify why it’s best for your specific app.
Presentation
Demo Video
Week 4: 3D User Interaction
Requirements
Goal: Create and manipulate 3D objects using only your gaze.
Instructions
Add functionality to instantiate objects while playing the game, so that users can create new GameObjects where they look. Examples include placing furniture on the floor, getting soda from a soda machine, shooting a projectile, spawning creatures, etc. Get creative! For full credit, objects should instantiate where the user looks and with a reasonable orientation (i.e. not clipping through the floor or rotated sideways).
Implement at least one way to transform objects while playing the game, so that users can select and manipulate different GameObjects just using gaze. Possible transformations include translate (move objects), rotate (change the orientation of objects), and scale (change the size of objects). You’re only required to implement one of these transformations, but feel free to add more. For full credit, the expected behavior is that a) at least one transformation method is implemented, b) transformations are smooth, and c) transformations are responsive to the user’s gaze.
Connect object instantiation and transformation modes to the gazeable UI, so that users can easily switch between instantiation, transformation, and locomotion modes by selecting different UI options. For full credit, the expected behavior is that a) users should be able to select different modes using UI options, b) there should be a clear indication that each mode has been selected, and c) only one mode should be active at any given time.
Implement a system that makes transforming objects in your environment more precise. It’s up to you what this system is, but it should improve the user’s ability to manipulate objects with a high level of accuracy. In the systems shown in the tutorial videos, it’s very difficult to precisely transform objects (for example, rotating a table exactly 90 degrees, or placing a chair exactly underneath a table). In your slide, explain why your added system makes object manipulation easier. If you already believe your existing transformation is precise, justify why it doesn’t need improvement in your slide. Examples of new systems could include snapping, symbolic input, grids, transformation menus, fixed increments, and more.
Presentation
Demo Video
Week 5: Wayfinding and VR Input
Requirements
Goal: Add a wayfinding technique to your application, and make UI panels draggable with gaze.
Instructions
Implement a wayfinding technique that allows the user to better navigate their environment, view the scene in a more useful way, or find a destination. Examples of wayfinding include minimaps, compasses, directional arrows, destination markers, etc. For full credit, your wayfinding technique should be relevant and useful in the context of your chosen application and should help the user accomplish something. Some examples of good wayfinding include a) a minimap in an interior design application that always shows a top-down view of the room, b) arrows that show the user where the nearest enemies are, c) a compass or directional arrow that points toward a final destination, or d) lines that users are supposed to follow in a racing game.
Make any UI panels draggable and always face the player, so that users can easily move obstructive panels to different places in their environment and still interact with UI options on that panel. There should be a clear drag area on the panel that users should look at to move the UI, and no other actions (such as movement, instantiation, or transformation) should occur while dragging a panel.
Add another wayfinding technique to your application with the same requirements as your previous one. This technique can be better, worse, or equally useful as the first technique, so get creative! You should compare the two wayfinding techniques, evaluate their pros and cons, and explain which one is better for your specific application.
Presentation
Demo Video
Week 6: Testing and Special Topics
Requirements
Goal: Experiment with and choose extra features to add to your application.
Instructions
Experiment with and add extra features to your application, by choosing and implementing a few of the bonus topics discussed in this week’s videos. For full credit, you will need to receive at least 6 points by combining different features from the rubric below. Note that easier features are worth fewer points, but harder features have partial credit opportunities. You cannot receive extra credit by adding more features, but we still encourage you to experiment with them! Try to pick the features that work best for your application.